New Year Wishing Tree: A Thoughtful and Creative Craft for the Whole Family!
A NEW YEAR'S FAMILY TRADITION
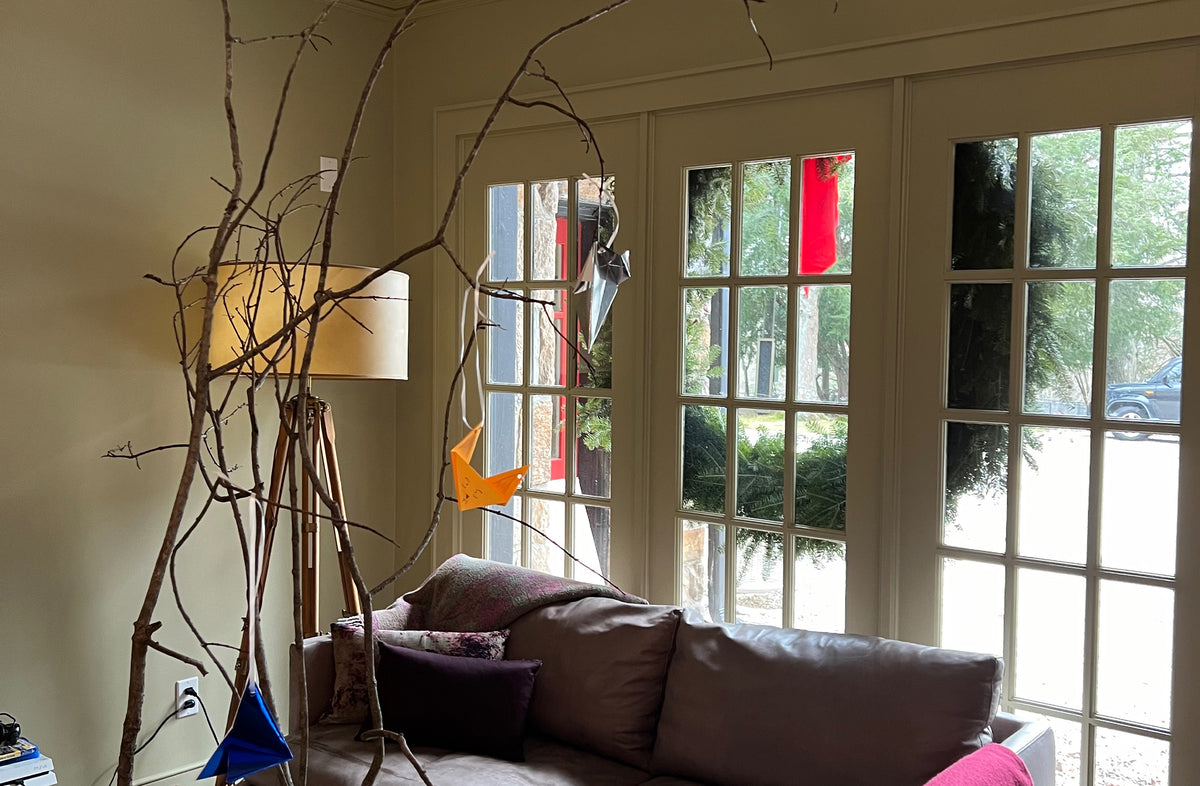
Every year, right after Christmas, our family anticipates the year ahead and looks back at the year we will leave behind through our New Year tradition of creating a wishing tree. We gather round throughout those quiet days between Christmas and New Year's Eve over coffee, hot chocolate, ginger tea, and snacks and fold origami papers into beautiful sculptures. Inside each origami, we write something about the year past or the year to come. We memorialize beautiful moments in the past that we want to highlight to ourselves and scribble them onto a colorful sheets of square paper. We make our intentions for the year to come and jot them down and with a meditative approach, we follow instructions or create our own spontaneous wishing tree ornaments. The process can take place over several days and into the early days of the new year. The tree becomes more and more full and stays in the middle of our living room for weeks ahead as a beautiful arrangement and a reminder of the time we spent together.
Join our family tradition this year with this step-by-step guide to your own wishing tree!
Supplies Needed:
- Branches - If you're not able to forage your own, pipe cleaners are a great alternative for a mini version.
- Vase
- Gift wrap ribbon (Use leftovers from Christmas!)
- Hole punch
- Scissors
- Writing utensil
- Origami paper - The more colorful the better!
- Origami instructions - Pinterest has lots of options available for download.
Steps:
1. Forage your own branches.
Go outside and collect branches from around your yard, if you're able. Try to find larger branches with lots of little branches to hang your wishes from. Remember to clean off any dirt or debris and let them dry if they're wet!
 If you don't have the option to forage your own branches, you can always head to your local craft store and grab some pipe cleaners to create a mini version of your wishing tree. You can twist and connect them to make your tree smaller or larger!
2. Search for origami instructions.
We downloaded our guides from Pinterest, but the internet is abundant with lots of different resources for them, or check out your local craft store for an origami folding kit!
 3. Set up your craft station.
Gather up your scissors, gift wrap ribbon, writing utensil, hole punch, and don't forget the origami paper and instructions! Set up your station in a de-cluttered area - hard surfaces work best to create clean fold lines.
 4. Write your intentions.
Before you begin folding, be sure to write your intentions inside each ornament. You can write down your goals for next year or special moments from the previous year. We wrote special notes to ourselves that we put inside origami boxes! There are no rules, these are YOUR wishes.
 5. Time to fold!
Grab your paper and your guides and start folding! Create as many ornaments as you want. Your tree can be filled with them or maybe you prefer a more Charlie Brown-esque tree.
 6. Turn your origami into ornaments.
Once you've created your origami shapes, find where you want the origami to hang from and hole punch that spot. Then, cut your gift wrap ribbon using your scissors and loop it through the hole and tie the ends in a knot. Now, your ornament is ready to be hung up!
 7. Set up your tree.
Now that you've created your ornaments, it's time to set up your tree. Grab your vase and put the branches inside. Once you've done that, place your tree where you'd like to keep it and now it's time to start hanging!
 8. Decorate!
Yay! It's finally time to decorate your tree! Place the ribbon loops of the ornaments on your branches wherever you'd like. If you'd prefer more decorations, add anything you'd like!
 Do this over several days and several occasions. The results will be so colorful and beautiful and the best treasure is time spent with family.